
# Workers
# Accepting your Invitation
After the administrator has setup your Worker Username, you will receive an email that will ask you set up your new password. The email will look like the one below.
WARNING
Remember the Username in the email. You will need both your Username and your password to log in to the system.

Clicking on the button take you to a screen to set up your new password.
# Setting your Password
If you are being setup as a new Worker or have forgotten your password, you will receive an invitation sent to your email as shown in the section above. When you click on the button, you will be taken to the screen below. Enter your email and then your new password twice.
TIP
Use your email address to create your new password.

# Logging In
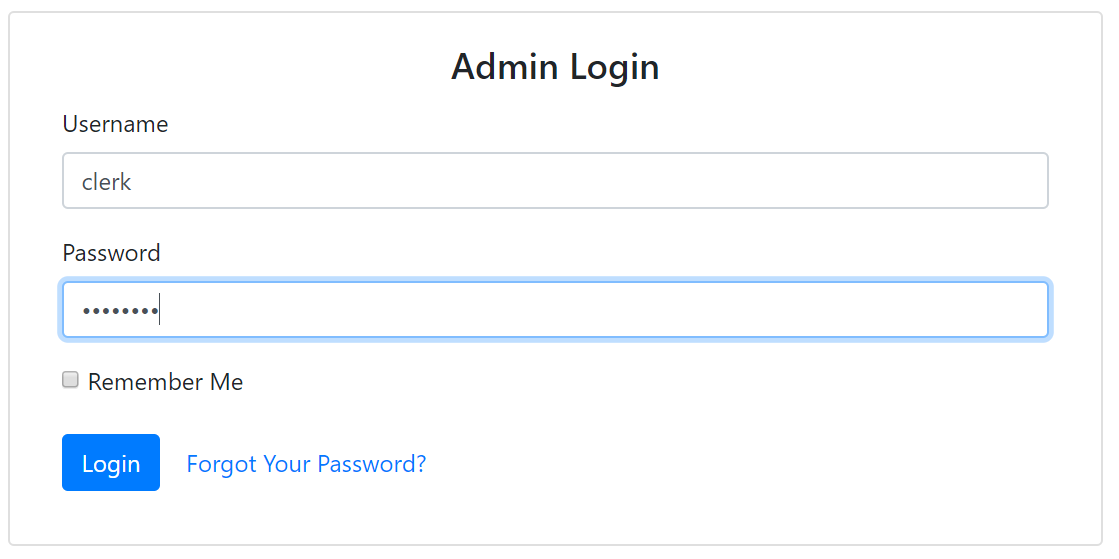
After setting your password, you will be taken to the Worker login screen as shown below.
TIP
Use your Username to login as a Worker.
# Home Page
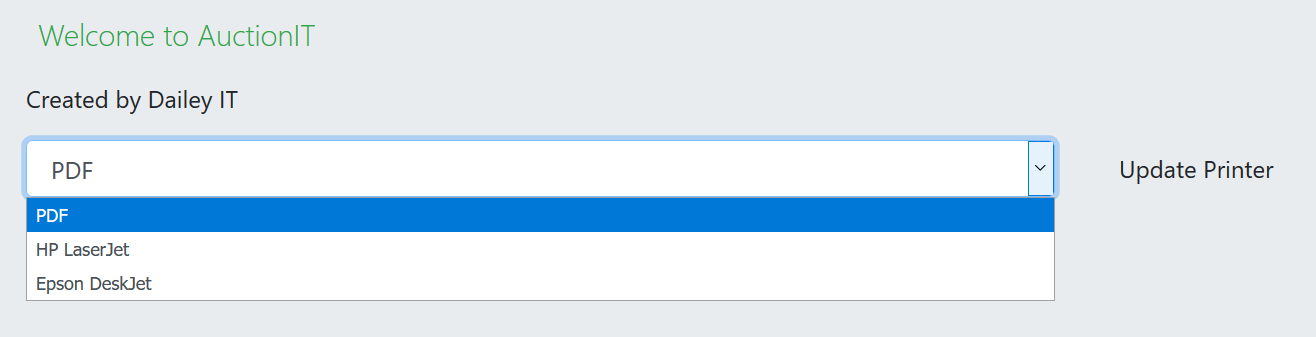
Certain roles need the ability to print. By default, AuctionIT prints to a pdf file. If other printers have been set up for your auction, you can change the option by selecting the printer in the drop-down Menu on the Home Page and clicking Update Printer.
# Logging Out
To exit AuctionIT, select your name in the upper right corner of the Menu. Logout is the last option on that Menu.

# Roles
# Clerk
The clerk has the ability to enter the results of the activity on a line. Clerking a line does not require printing so the printer setup on the Home Page can be ignored.
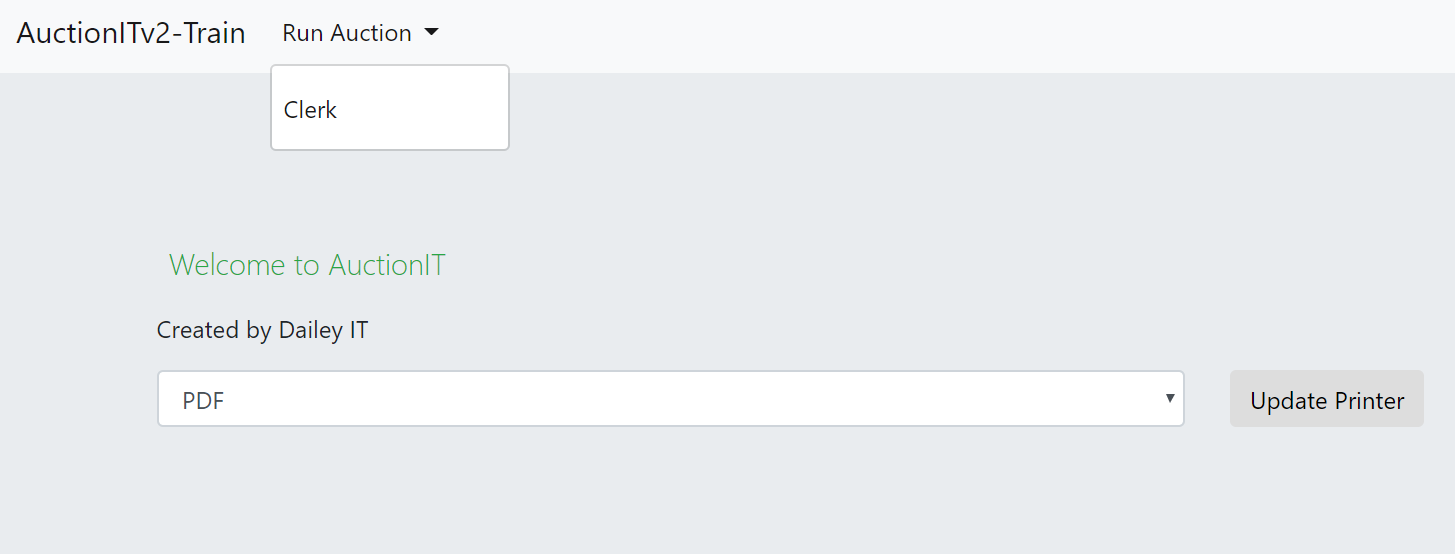
The Clerk Screen is accessed through the Menu Run Auction->Clerk as shown below.
# Clerking
After selecting the Clerk option, you will see the Auction Lines screen as shown below showing you the Lines that are available for clerking.
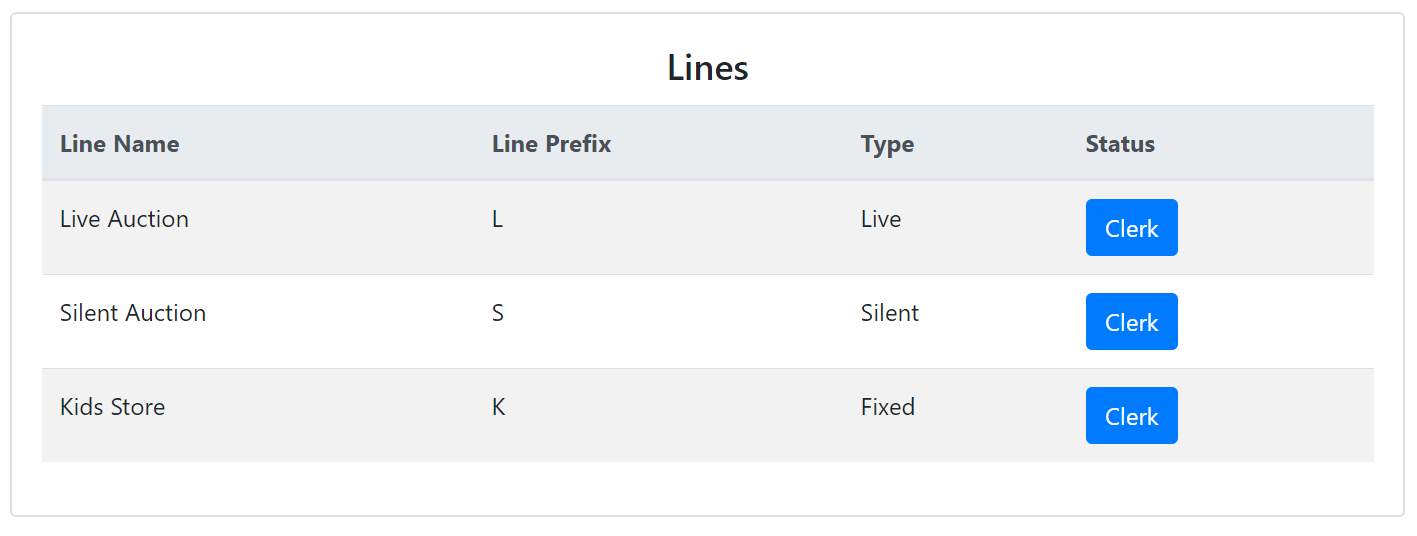
The Clerk screen works the same for the 3 types of lines. When you select the line you want to clerk, by clicking the "CLERK" button, you will see the following screen.
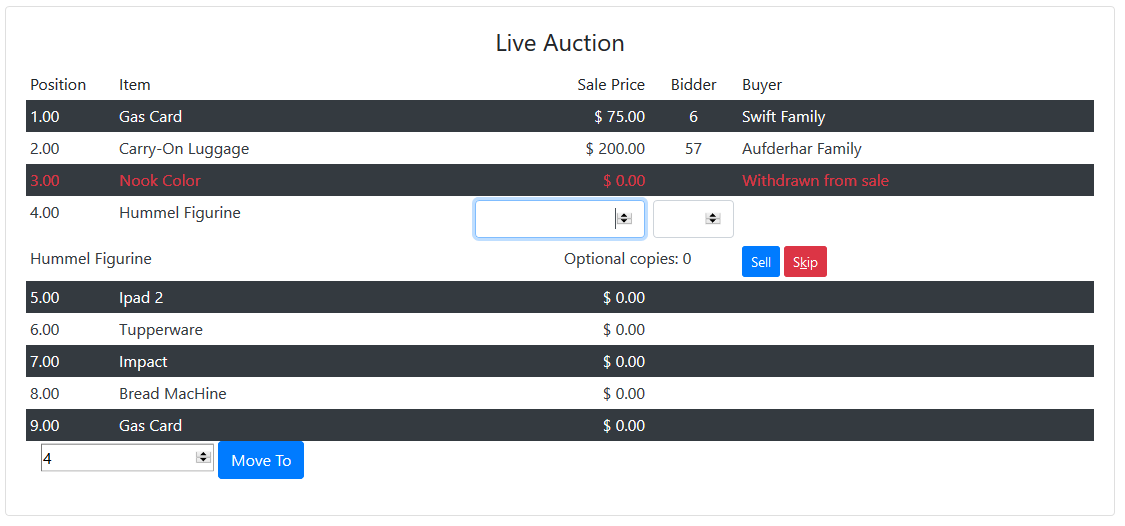
The Clerk screen will open and take you to the first unsold position (item). If you are starting the line, that should be position 1. The screen will show you up to the next 5 items after the current position. It will also show you up to the previous 10 positions. Once the auctioneer has said sold, you will have the task of entering the final sale price. It is entered in the Sale Price box first. Then you press "ENTER" or "TAB" to move to the Bidder box. Enter will take you to the next field if both fields have not been completed. After you type in the bidder number, you can press Enter again. You can also click on the "SELL" button. Since both fields have been completed, the screen will move to the next line. The system will lookup the Buyer and put the Supporter’s name in the column under Buyer. You are now ready to sell the next item.
# Moving to a Different Item
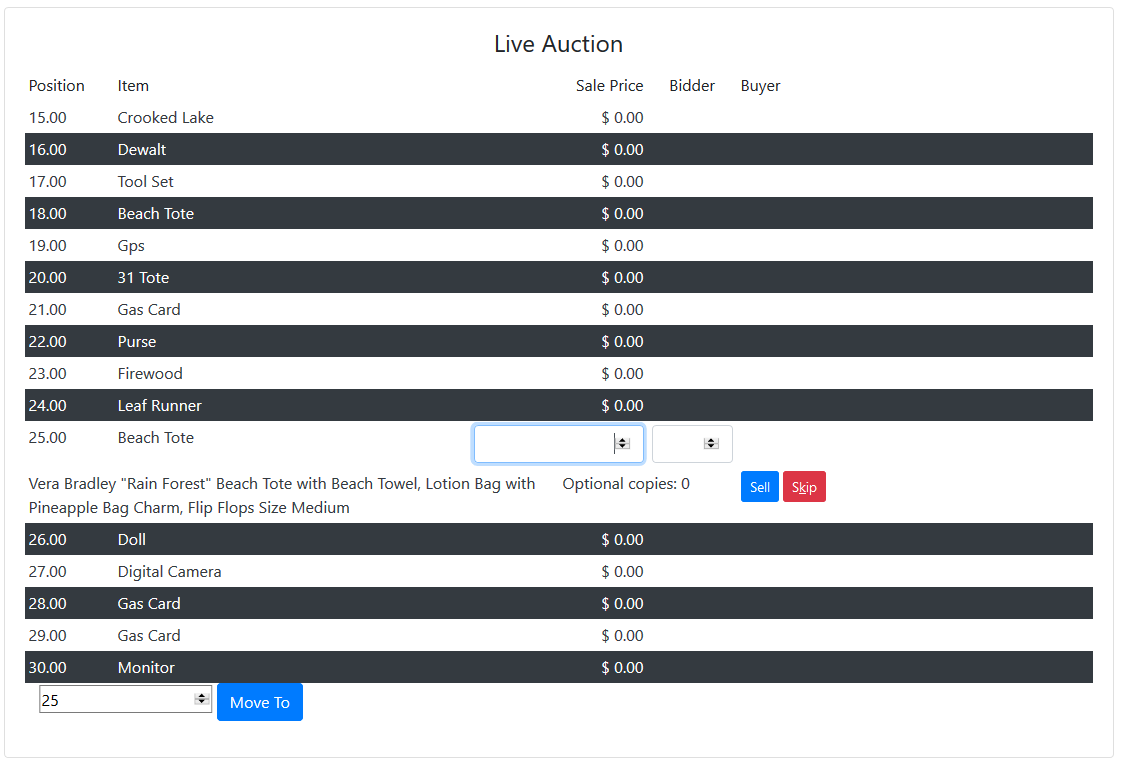
To move to a different item than the next item, you can click on the row of the item if it is on the screen. You can also enter the position you want to go to in the box beside the Move To button and then click on "MOVE TO" button. In the example below, position 25 was entered and the button clicked. In this example you can see that the screen shows 10 positions before and 5 after.
# Skipping an Item
If for some reason an item is not sold (the item was put on the wrong line, misplaced, received no bids, etc.), the item should be skipped. To do this either click on the Skip button or click on "ALT-K". This will mark the item as Withdrawn from Sale.

If for some reason you later need to sell the item, you can return to it by clicking on the row or using the "MOVE TO" button to find it.
# Optional Copies
The Optional copies button is for items that can be duplicated and sold. There are typically 2 types of items where this is use.
- Your organization has multiple items of the same thing that you want to sell. For example, you may have 5 copies of a book signed by the author. You want to sell all of them at the same time.
- An item that is up to the discretion of the donor to duplicate. For example, someone donates a week at their condo with instructions that if the week brings over a certain amount, they would donate a second week to be sold to the second place bidder.
In the example below, your organization has purchased $50 gas cards, but the extras can be returned if they do not sell for more than $50. Now you have an additional button. If you press "ENTER" or click on the "DUPLICATE & SELL" button, the item will be sold and a new record will be added for another sale.

After the sale, you get the screen below. The number of Optional copies has reduced by 1. The Sale Price was pre-filled with the amount of the last sale.

If the next item sells for less than $50, then your organization does not want to duplicate the item. The you can click on the Sell Only button or press "ALT-S". This will make the sale without duplicating the item.
If you mistakenly duplicate an item, press "SKIP" to Withdraw the final copy from sale.
When have completed the line, make sure that you hit "ENTER" or click the "SELL" button on the final item. Your last screen should look like below.

# Finishing a Line
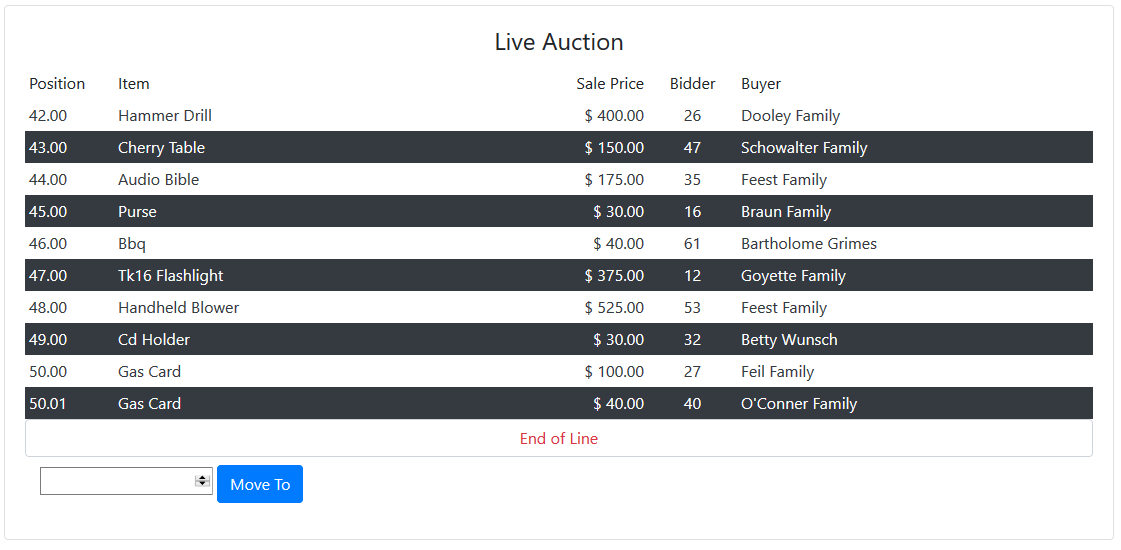
The second example below shows when you get within 5 positions of the end of the line that “End of Line” displays to let you know when you are done.
When you are done in the Clerking area, you should logout of the system by choosing "LOGOUT" from the drop down Menu in the upper right of the screen that has your user name.
# Special Case - 2 Buyers Want to Split a Purchase
For example, 2 families want to purchase a vacation week and share it. Enter the bidder number of one of the bidders into the clerk screen. Send the 2 buyers to your Auction Administrator. The Administrator has a screen where a purchase can be split between multiple buyers. That cannot be done from the clerk screen.
# Cashier
In your role as as Cashier, it will be your task to both Check In and Check Out the supporters. From the main auction page after you have logged in, go to the Drop Down Menu Run Auction-> Check In. This will bring you to the Bidder (Supporter) Check In page.
# Check In
To start, you click in the Search box and start typing the last name of the Supporter. After typing the first few letters of the name, all Supporters with those letters will show up. Once you have found the correct supporter, the next step is to click on the "ASSIGN BIDDER" button. This will automatically assign the Supporter the next available Bidder Number.
The final step is to print the Bidder Card. First, select the number of copies of the Bidder Card the Supporter wishes to have. You can increase the or decrease the numner of cards by clicking on the small up and down arrows in the box under "COPIES". This allows the supporter to have Bidder Cards for each family member or Business Associate.
If you are connected directly to a printer, clicking on the "PRINT CARD" button will automatically start printing the bidder cards. If you are not connected directly to a printer, a pop up box will appear with a PDF image of the card in it. From here you would need to save the image or print it from another printer. These options would be determined by your Auction Adminstrators.
If the PDF pop up box appears, you will need to close it before checking in the next supporter.
If a supporter is not found when typing in the name, you will need to add them to the auction from the "Supporter's Page".
TIP
Open multiple tabs in your browser window. With one tab on the "Bidder Check In" page and another on the "Supporter" page. This will allow you to move back and forth between the pages quicker when you need to add a new supporter.
# Donation Coordinator
# Donation Representative
You have the ability to enter donations foryour organization as well as add supporters. Donations are managed using the Auction Setup Menu.

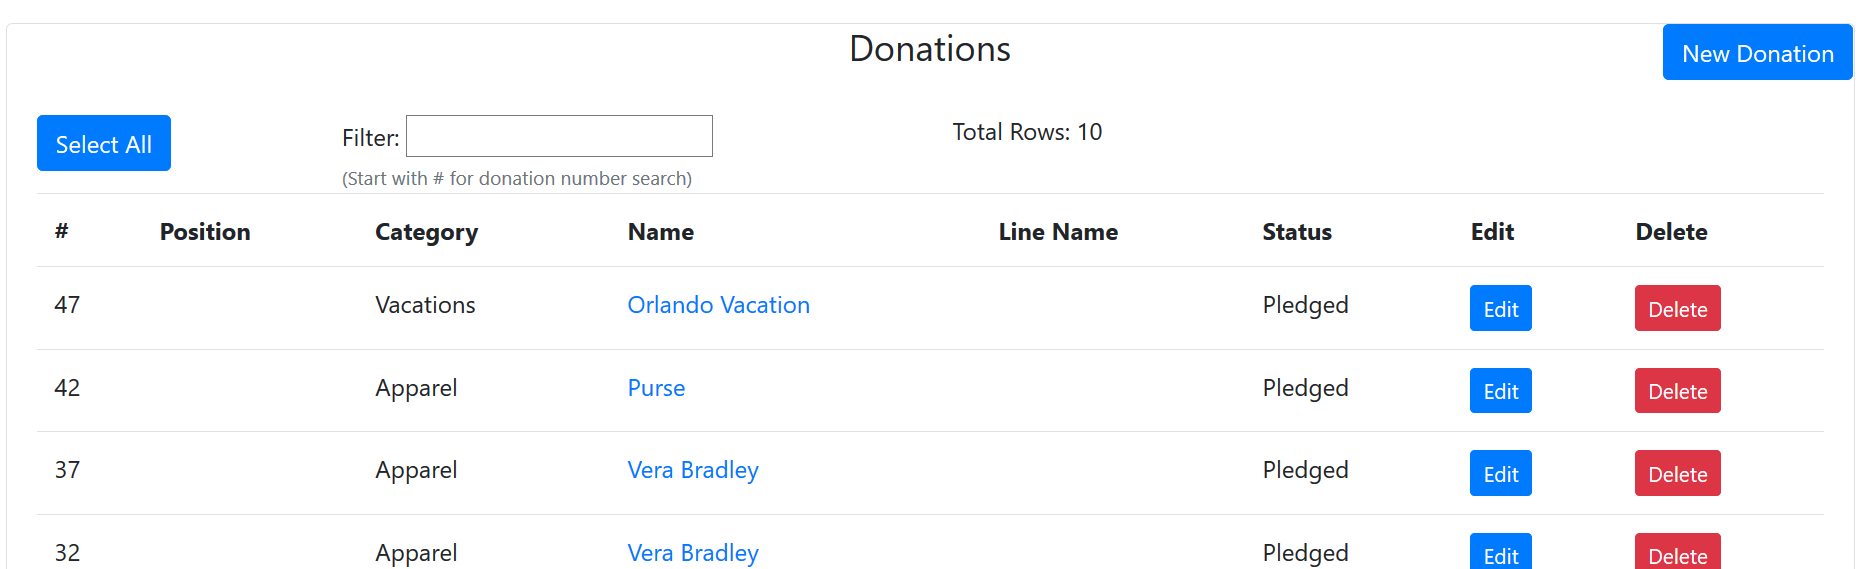
When you select Auction Setup->Donations, you will see the Donations screen which shows your donations. This screen allows you to add, edit or delete a donation. When you click on the Name of the donation, the system will take you to a screen that will show you the donation, but not allow you to edit it. To edit the donation, click the Edit button on the line of the donation.
WARNING
Donations that have been sold cannot be deleted.
To add a new donation, click the "NEW DONATION" button in the upper left corner of the screen. The image below shows you the Create Donation screen.
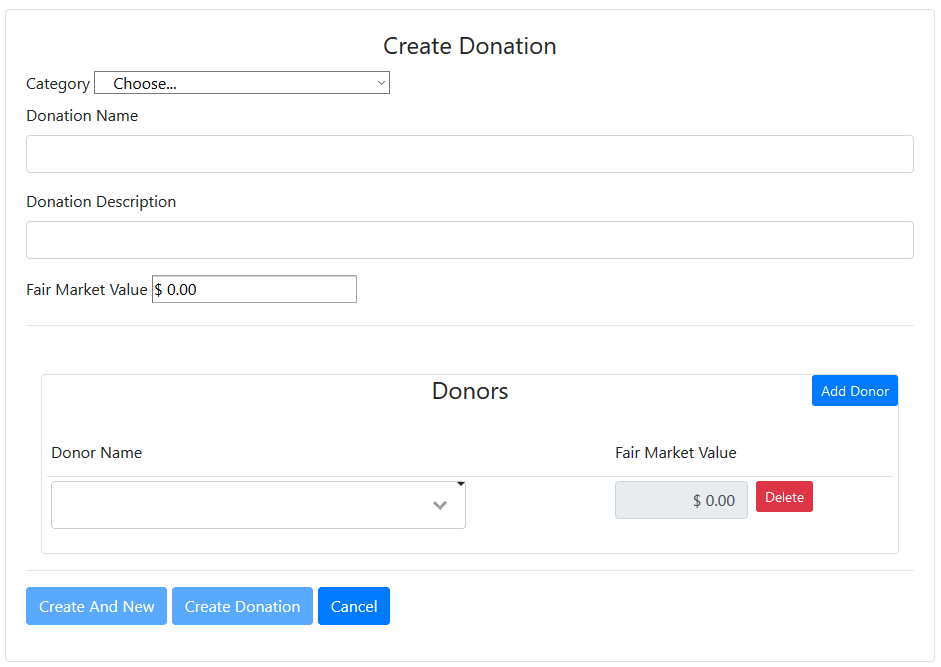
Choose a category for the donation from the drop down menu, enter a name and then a description of the item. For the name and the description, the system will suggest a formatted name with capitalization of key words. This is to make a more consistent auction book.

Enter the fair market value of the item.
In the Donors box, one or more donors can be added. Begin by entering part of the donor's name into the Donor Name box. Once you have entered at least 4 letters, the box will begin searching for names. When you have found the correct Donor select their name from the list. If you cannot find the Donor, you will need to add them from the Supporter's Page by adding a new Supporter.

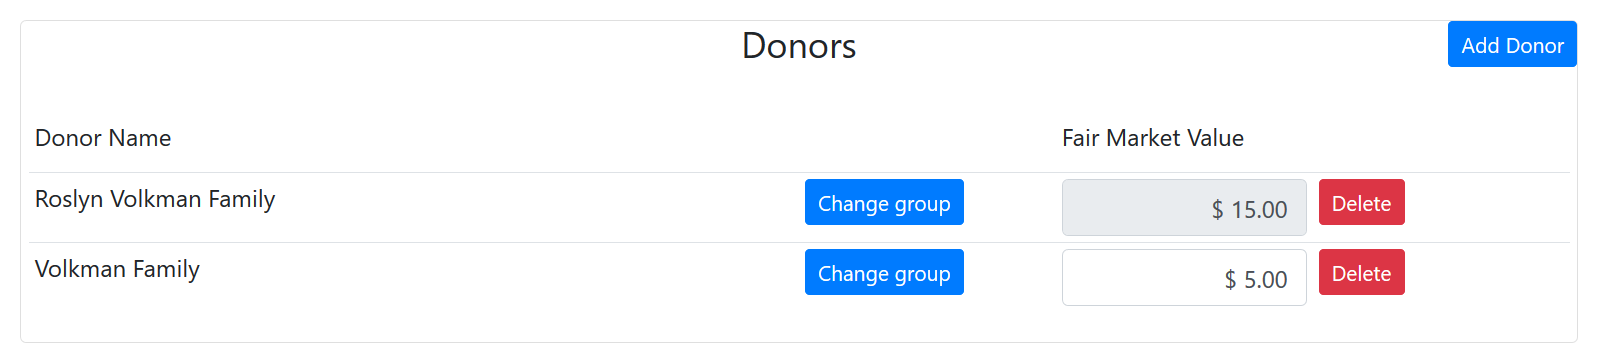
To add a second donor, press the "ADD DONOR" button. A second line will appear. Search and find the next donor. Enter the portion of the total value that the second donor provided. The amount for the first donor will always be the full fair market value minus the fair market value assigned to all other donors.
Once all the donors have been entered, you can press the "CREATE AND NEW" button to create the new donation and remain on this screen for entering more donations or press the "CREATE DONATION" button to create the donation and return to the Donation List screen.
# Vending
Vending does not have anything that needs printing so the printer setup on the Home Page can be ignored.
The Vending Screen is accessed through the Run Auction Menu using the Vending selection as shown below.
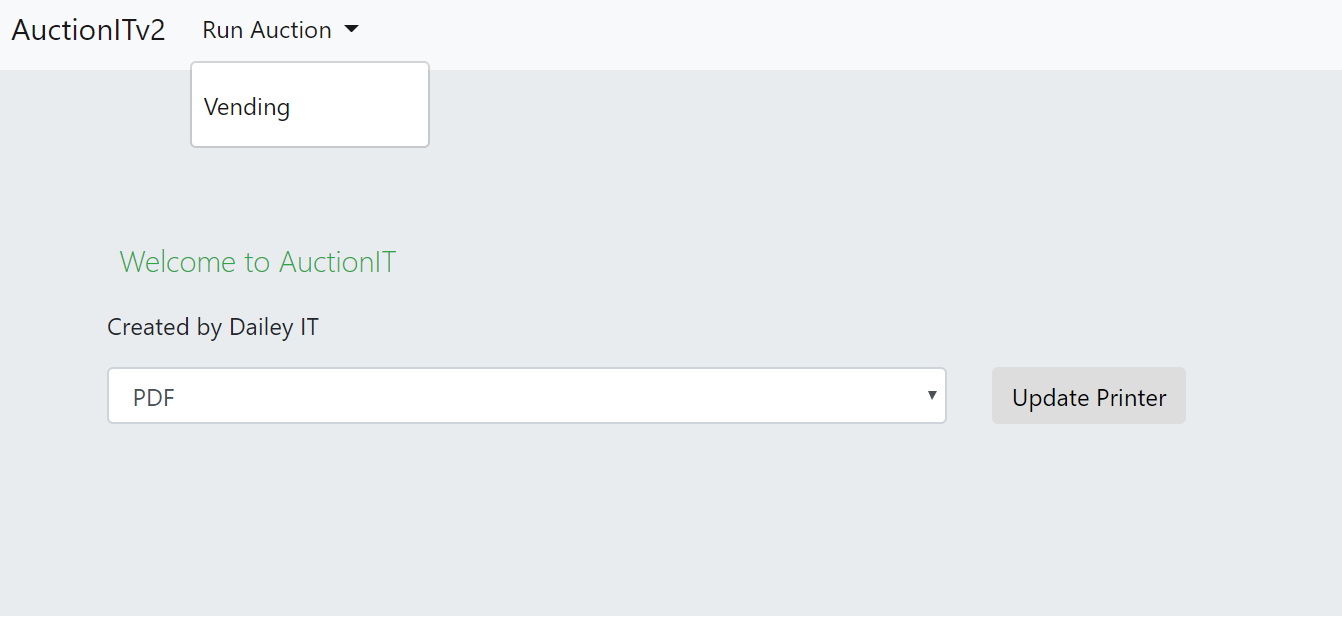
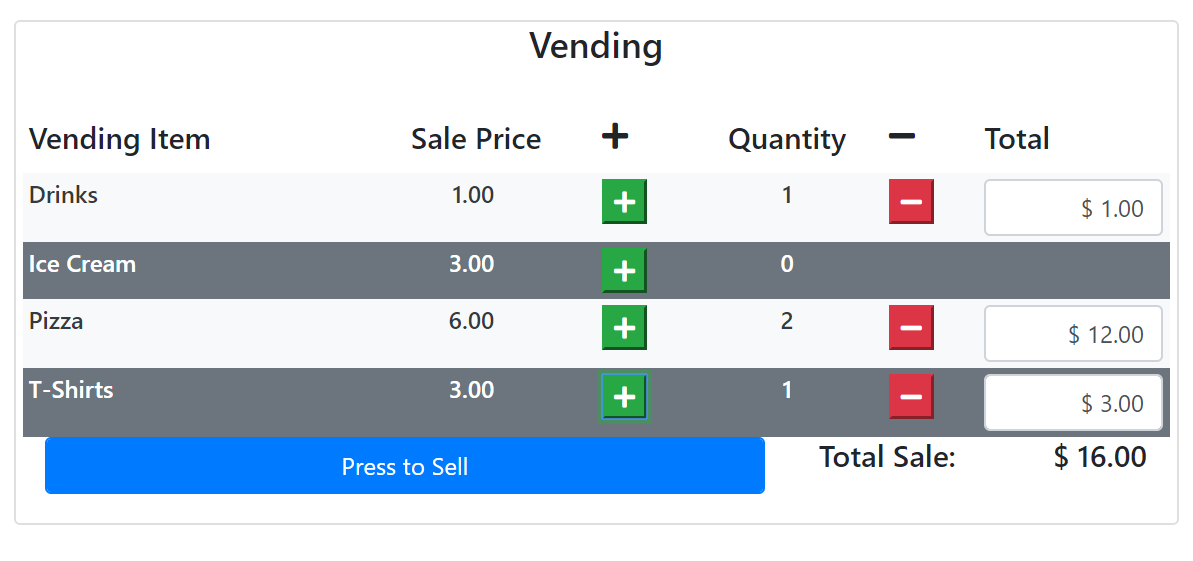
After selecting the Vending option, you will see the Vending screen as shown below. Your auction administrator chooses which items are available for you to sell. In the training database, the login, vending, can sell the 4 items shown below.
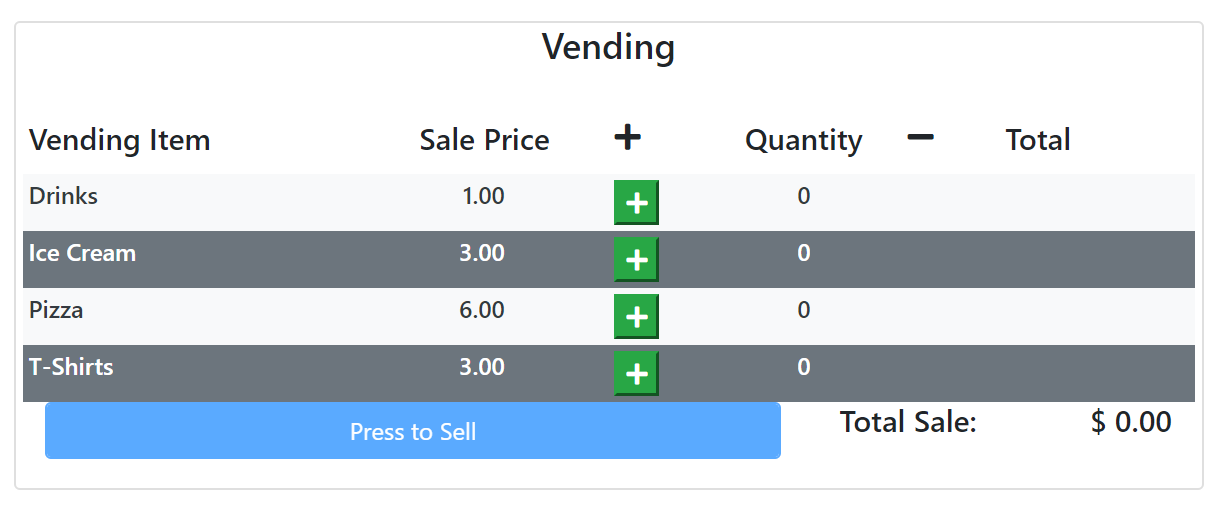
When you enter the screen, your list of items is show along with the sale price, a green "+" button and the quantity. If you are using a touch enabled device, you can touch the green "+" button. If not, use the mouse to click on the green "+" button. When you do, the quantity is increased and a red "-" button appears. The red "-" button only appears on a line if the quantity is 1 or more.
The total amount for the item will also be calculated each time the green "+" button or the red "-" button is pressed based on the quantity and the sale price.
# Vending Discount
You can edit the total price for each line. However, if you change the quantity, the total will be recalculated using the original sale price and the discounted price would need to be entered again. In the example below, the total for T-Shirts has been changed to give a discount of $1.00.
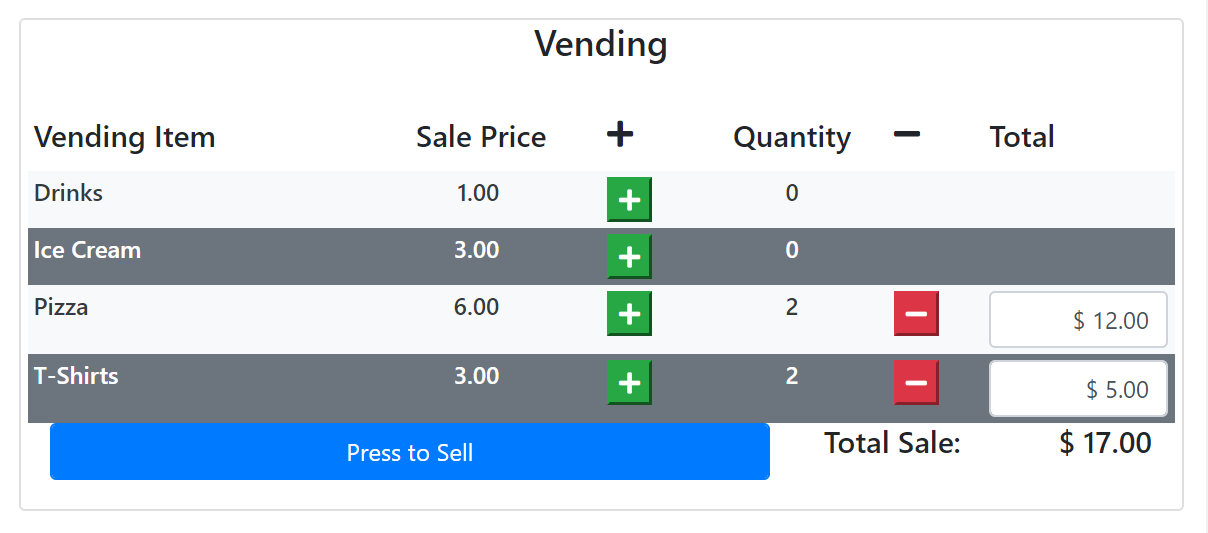
When all the items to be sold have been entered, press or click on the "PRESS TO SELL" button. This will open the Final Sale screen as shown below.
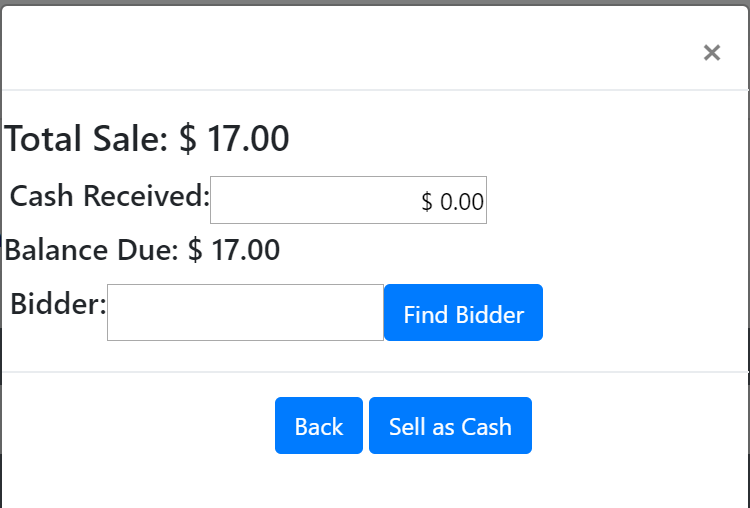
On the Final Sale screen, you have the option of selling the items for cash or putting them on a Bidder’s account. If the buyer gives you cash, you can enter the amount in the cash received. If it is more than the amount, the screen will calculate the change for you to give back.
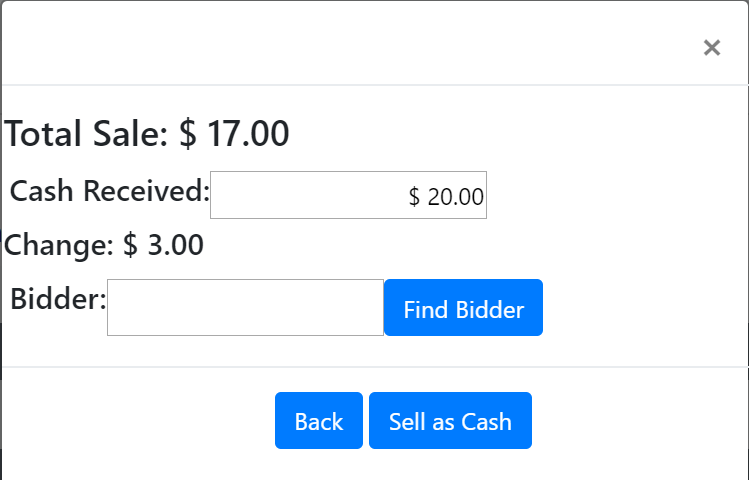
# Vending Overpayment
Sometimes a buyer will tell you to keep the change as a donation. Whether the buyer wants change back or not, press or click onthe "SELL AS CASH" button to complete the transaction. This will return you to the Vending screen. All quantities will be reset to 0.
If the buyer wants to put the purchase on their Bidder account, you can either enter the bidder number in the Bidder field or use your device’s camera to scan the QR code that is on the Bidder’s card. If the bidder number exists, a confirmation screen will appear showing you the bidder’s name.
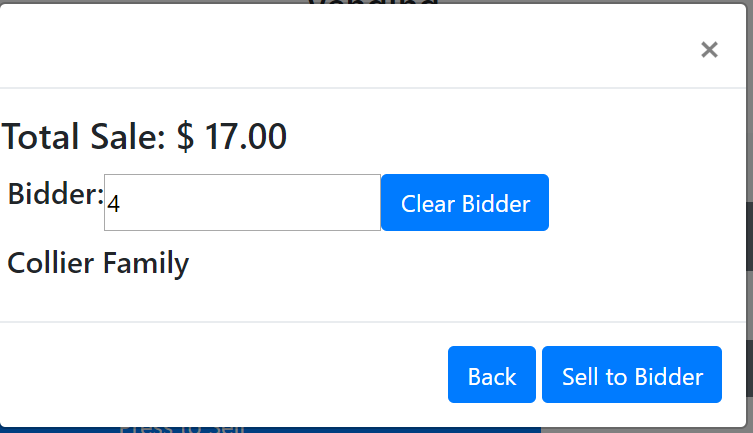
If the bidder is correct, press or click on the "SELL TO BIDDER" button. This will complete the sale and return you to a reset Vending screen.
If the bidder is incorrect, press or click on the "CLEAR BIDDER" button. This will clear the bidder name and return you to the first confirmation screen.
From either of the confirmation screens, the Back button returns you to the Vending screen with the vending quantities still selected. This allows you to correct any mistakes in quantities.
When you are done vending, logout of AuctionIT.